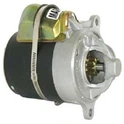
Hey there! As a supplier of the Starter - Delco PG - 260F2, I often get asked about how to clean this nifty little piece of equipment. So, I thought I'd put together a blog post to share some tips and tricks on keeping your Starter - Delco PG - 260F2 in top - notch condition.


First off, let me give you a bit of a background on the Starter - Delco PG - 260F2. It's a reliable starter that comes in different variations, like the 12V Starter - Delco PG - 260F2, the 1.5KW Starter - Delco PG - 260F2, and the 11 - Tooth Pinion Starter - Delco PG - 260F2. These starters are used in a variety of applications, and proper cleaning is essential for their long - term performance.
Why Cleaning is Important
Cleaning your Starter - Delco PG - 260F2 isn't just about making it look good. Over time, dirt, grime, and debris can build up on the starter. This buildup can cause several problems. For one, it can increase the operating temperature of the starter, which can lead to premature wear and tear. Dirt can also get into the moving parts of the starter, causing friction and potentially jamming the mechanism. A clean starter is more efficient and less likely to break down, saving you time and money in the long run.
Tools and Materials You'll Need
Before you start cleaning, gather the necessary tools and materials. You'll need:
- A socket set: This will come in handy for removing any bolts or nuts that hold the starter in place.
- A wire brush: A good quality wire brush will help you remove stubborn dirt and rust from the starter's surface.
- Compressed air: Compressed air is great for blowing out dirt from hard - to - reach places.
- Electrical contact cleaner: This is essential for cleaning the electrical connections on the starter.
- A clean cloth or rag: You'll use this to wipe down the starter after cleaning.
- A bucket of warm, soapy water: Mild soap and water can be used to clean the exterior of the starter.
Step - by - Step Cleaning Process
Step 1: Safety First
Before you do anything, make sure the power is disconnected. If the starter is installed in a vehicle, turn off the engine and disconnect the battery. This will prevent any electrical shocks or short - circuits while you're cleaning.
Step 2: Remove the Starter
Use your socket set to remove the bolts or nuts that hold the starter in place. Carefully lift the starter out and place it on a clean, stable surface. Be gentle as you handle the starter to avoid damaging any of the components.
Step 3: External Cleaning
Start by using the wire brush to scrub the exterior of the starter. Pay special attention to areas where dirt and rust have accumulated. You can use the warm, soapy water to help loosen the dirt. Dip the wire brush into the soapy water and scrub the starter in a circular motion. After scrubbing, rinse the starter with clean water and dry it thoroughly with a cloth.
Step 4: Cleaning the Electrical Connections
The electrical connections on the starter are crucial for its proper functioning. Spray the electrical contact cleaner onto the connections and use a clean cloth to wipe away any dirt or corrosion. Make sure the connections are completely dry before proceeding.
Step 5: Blowing Out Dirt
Use the compressed air to blow out any dirt or debris from the starter's vents, holes, and other hard - to - reach areas. Hold the can of compressed air at a safe distance and use short, controlled bursts. This will help remove dirt that may have gotten trapped inside the starter.
Step 6: Re - installation
Once the starter is clean and dry, it's time to reinstall it. Carefully place the starter back in its original position and use the socket set to tighten the bolts or nuts. Make sure the starter is securely fastened.
Step 7: Reconnect the Power
If you disconnected the battery, reconnect it. Double - check all the connections to make sure they are tight and secure.
Tips and Tricks
- If you encounter stubborn rust that the wire brush can't remove, you can use a rust remover. Just make sure to follow the manufacturer's instructions and rinse the starter thoroughly after using the rust remover.
- When using the compressed air, be careful not to blow the dirt deeper into the starter. It's a good idea to start from the top and work your way down.
- If you're not comfortable cleaning the starter yourself, you can take it to a professional mechanic. However, learning how to clean it yourself can save you money and give you a better understanding of how the starter works.
Maintenance After Cleaning
Cleaning your Starter - Delco PG - 260F2 is just the first step. Regular maintenance is also important. Check the starter periodically for any signs of dirt or damage. If you notice any issues, clean the starter again or have it inspected by a professional.
Conclusion
Cleaning your Starter - Delco PG - 260F2 is a relatively simple process that can have a big impact on its performance and lifespan. By following the steps outlined in this blog post, you can keep your starter running smoothly for years to come.
If you're in the market for a new Starter - Delco PG - 260F2 or need any other related products, don't hesitate to reach out. We're here to help you find the right starter for your needs and can provide you with all the support you need. Whether you're a DIY enthusiast or a professional mechanic, we've got you covered. Contact us for more information and to start a procurement discussion.
References
- General automotive repair manuals
- Manufacturer's guidelines for the Starter - Delco PG - 260F2