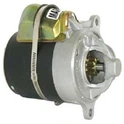
As a supplier of Starter - Ford 4 - 1/2 In, I've encountered numerous customers seeking guidance on various maintenance tasks, especially the replacement of brushes in these starters. In this blog, I'll walk you through the step - by - step process of replacing the brushes in a Starter - Ford 4 - 1/2 In.


Understanding the Importance of Brushes in a Starter
Before we dive into the replacement process, it's essential to understand the role of brushes in a starter. Brushes are a crucial component of the starter motor's electrical system. They transfer electrical current from the stationary part of the motor (the field coils) to the rotating part (the armature). Over time, brushes wear down due to friction and electrical arcing. When the brushes become too short, they can no longer maintain proper contact, leading to starting problems such as slow cranking or failure to start altogether.
Tools and Materials You'll Need
- A set of wrenches and sockets: Different sizes are required to remove the starter from the vehicle and disassemble it.
- Screwdrivers: Both flat - head and Phillips - head screwdrivers may be needed to remove covers and fasteners.
- New brushes: Make sure to get the correct brushes for your Starter - Ford 4 - 1/2 In. You can find high - quality replacement brushes from reliable suppliers like us.
- A clean cloth: To wipe down components and remove any dirt or debris.
- Electrical contact cleaner: This helps to clean the electrical terminals and contacts for better conductivity.
Step 1: Safety First
Before you start working on the starter, ensure your vehicle is parked on a level surface, the engine is off, and the ignition key is removed. Disconnect the negative battery cable to prevent any electrical shocks or short circuits during the process.
Step 2: Remove the Starter
Locate the starter on your Ford vehicle. The Starter - Ford 4 - 1/2 In is typically mounted near the bottom of the engine, close to the transmission. Use your wrenches and sockets to remove the bolts that secure the starter to the engine block. Disconnect the electrical connections from the starter, including the large battery cable and any small wires. Carefully remove the starter from the engine bay and place it on a clean workbench.
Step 3: Disassemble the Starter
Inspect the starter for any covers or shields. Use your screwdrivers to remove these covers. You'll then be able to access the internal components of the starter. Look for the brush holders. The brush holders are usually located near the end of the starter where the armature shaft exits. They are small, rectangular or cylindrical components that hold the brushes in place.
Step 4: Remove the Old Brushes
Once you've located the brush holders, you'll notice that the brushes are held in place by springs or clips. Use your screwdriver or a small pick to carefully release the springs or remove the clips. Gently pull the old brushes out of the brush holders. Be careful not to damage the brush holders or any other components during this process.
Step 5: Clean the Starter Components
While the brushes are removed, take the opportunity to clean the inside of the starter. Use a clean cloth to wipe away any dirt, dust, or debris. Spray some electrical contact cleaner on the electrical terminals and contacts and use a cloth to clean them thoroughly. This will ensure good electrical conductivity when the new brushes are installed.
Step 6: Install the New Brushes
Take your new brushes and insert them into the brush holders. Make sure they fit snugly and are oriented correctly. Re - attach the springs or clips to hold the brushes in place. Ensure that the brushes can move freely within the holders without any binding.
Step 7: Reassemble the Starter
Once the new brushes are installed, carefully reassemble the starter. Replace the covers and shields that you removed earlier. Make sure all the components are properly aligned and tightened.
Step 8: Re - install the Starter
Take the reassembled starter and place it back in the engine bay. Re - attach the electrical connections, starting with the large battery cable and then the small wires. Use your wrenches and sockets to secure the starter to the engine block with the bolts.
Step 9: Reconnect the Battery
Finally, reconnect the negative battery cable to the battery. This restores power to the vehicle's electrical system.
Testing the Starter
After replacing the brushes and reinstalling the starter, it's time to test it. Insert the ignition key and turn it to the start position. The engine should crank smoothly. If you still experience starting problems, double - check all the connections and ensure that the brushes are installed correctly.
Related Products
If you're interested in exploring other options for your Ford vehicle, we also offer the 9 - Tooth Pinion Starter - Ford 4 - 1/2 in and the 12Volt Starter - Ford 4 - 1/2 in. These starters are designed to provide reliable performance and are compatible with a wide range of Ford models.
Contact Us for Procurement
If you're in need of Starter - Ford 4 - 1/2 In components, including brushes, or any of our other products, we're here to assist you. Whether you're a professional mechanic or a DIY enthusiast, we can offer you high - quality products at competitive prices. Reach out to us for more information and to start a procurement discussion. We're committed to providing excellent customer service and ensuring that you get the right parts for your needs.
References
- "Automotive Electrical Systems" by William H. Crouse and Donald L. Anglin
- "Starter Motor Repair Manual" published by an automotive repair guide publisher