Hey there! As a supplier of the Starter - Delco PG - 260F2, I'm stoked to share the installation instructions for this bad - boy starter with you. Whether you're a DIY enthusiast or a professional mechanic, getting this starter installed right is crucial for your vehicle's performance.
Pre - installation Checks
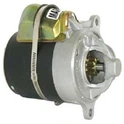
Before you even think about getting your hands dirty with the installation, there are a few things you gotta check. First off, make sure you've got the right starter for your vehicle. The Starter - Delco PG - 260F2 comes in different variations, like the 1.5KW Starter - Delco PG - 260F2, 11 - Tooth Pinion Starter - Delco PG - 260F2, and 12V Starter - Delco PG - 260F2. Double - check your vehicle's specifications to ensure you've got the correct one.
Next, take a good look at the starter itself. Inspect it for any visible damage, like cracks, dents, or loose parts. If you notice anything funky, it's best to contact us right away. We'll sort you out with a new one or give you advice on what to do.
Also, gather all the tools you'll need for the installation. You'll typically need a socket set, wrenches, a screwdriver, and maybe a jack if you need to lift the vehicle. Having everything ready beforehand will save you a lot of time and hassle.
Disconnecting the Battery
Safety first, folks! The very first step in the installation process is to disconnect the negative terminal of your vehicle's battery. This will prevent any electrical shocks or short - circuits while you're working on the starter. Use a wrench to loosen the nut on the negative terminal and then carefully remove the cable. Make sure it's out of the way and won't accidentally come into contact with the battery terminal.
Removing the Old Starter
Once the battery is disconnected, it's time to remove the old starter. Locate the starter on your vehicle. It's usually mounted near the engine's flywheel. You'll see a couple of bolts holding the starter in place. Use your socket set or wrenches to loosen and remove these bolts.
There will also be electrical connections on the starter. One is the main power cable, which is usually a thick red wire, and the other might be a smaller control wire. Carefully remove these connections. You can use a screwdriver to loosen the terminals if needed.
After removing the bolts and electrical connections, gently pull the old starter out of its mounting position. Be careful not to drop it or damage any surrounding components.
Preparing the New Starter
Before installing the new Starter - Delco PG - 260F2, take a moment to clean the mounting surface on the engine where the starter will go. Remove any dirt, grease, or debris. This will ensure a good, solid connection between the starter and the engine.
You might also want to apply a thin layer of anti - seize compound to the threads of the mounting bolts. This will make it easier to remove the starter in the future if you ever need to.
Installing the New Starter
Now, it's time to install the new starter. Carefully position the Starter - Delco PG - 260F2 in the mounting position on the engine. Make sure it aligns properly with the holes for the mounting bolts.
Insert the mounting bolts and hand - tighten them a bit. Then, use your socket set or wrenches to fully tighten the bolts. But don't over - tighten them, as this could damage the starter or the engine. Just make sure they're snug.
Next, reconnect the electrical connections. Start with the main power cable. Slide it onto the appropriate terminal on the starter and tighten the terminal using a wrench. Then, connect the smaller control wire if there is one.
Reconnecting the Battery
Once the new starter is installed and all the electrical connections are made, it's time to reconnect the battery. Take the negative cable and place it back on the negative terminal of the battery. Tighten the nut using a wrench until it's secure.
Testing the Starter
With the battery reconnected, it's time to test the starter. Turn the ignition key to the "Start" position. You should hear the starter engage and the engine start up. If it doesn't start, don't panic. First, double - check all the electrical connections to make sure they're secure. Also, make sure the mounting bolts are tightened properly.
If the engine still won't start after checking these things, there could be other issues at play. It might be a problem with the battery, the ignition system, or something else. In this case, it's a good idea to give us a shout, and we'll help you troubleshoot the problem.
Final Checks
After the engine starts successfully, take a moment to do a final check. Listen for any unusual noises coming from the starter or the engine. Check for any signs of leaks around the starter. Also, make sure all the electrical connections are still secure.
Conclusion
Installing the Starter - Delco PG - 260F2 isn't too difficult if you follow these steps. Just remember to take your time, be careful, and follow safety procedures. If you run into any problems or have any questions during the installation process, don't hesitate to reach out to us.


We're here to help you get the most out of your Starter - Delco PG - 260F2. Whether you need more information about the product, advice on installation, or are looking to make a purchase, we're just a message away. Contact us today to start a procurement discussion and get your hands on this top - notch starter.
References
- General automotive repair manuals
- Delco product documentation